BOOKS AND SPOONS
  • Home
  • Books
  • Spoons
  • About
  • Contact
  • Home
  • Books
  • Spoons
  • About
  • Contact

Books & Spoons Recipe for THE FRIED GREEN TOMATOES

25/8/2017

0 Comments

 
Picture
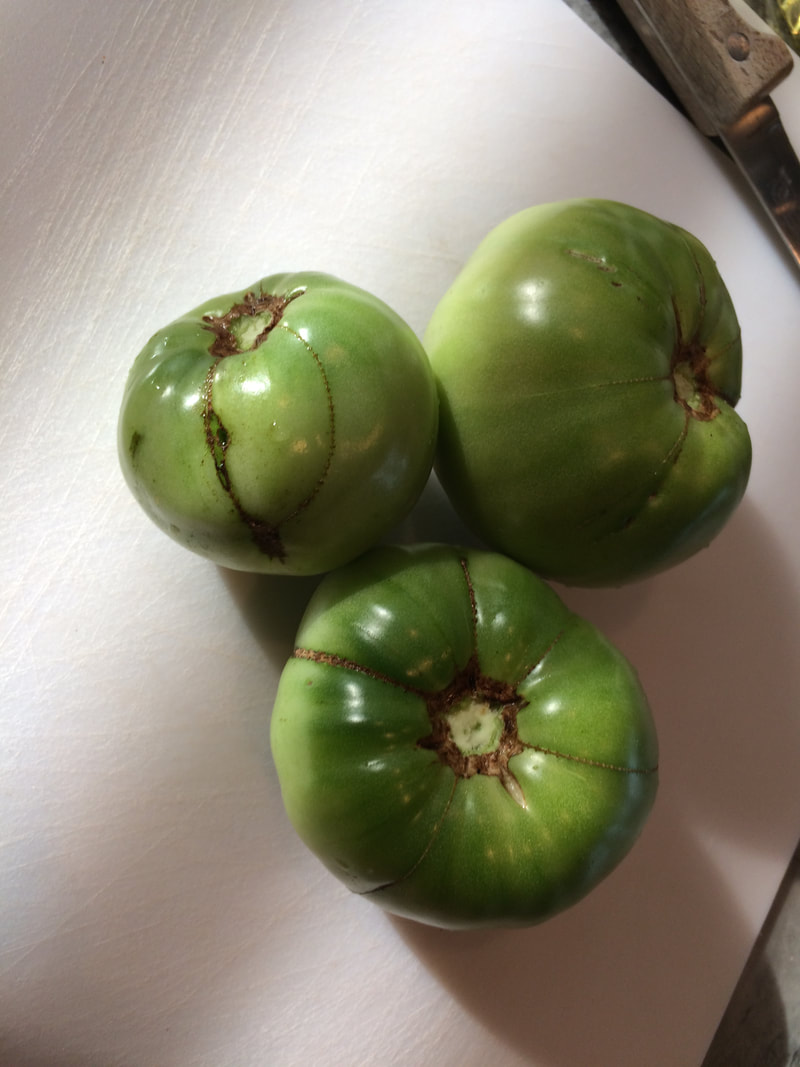
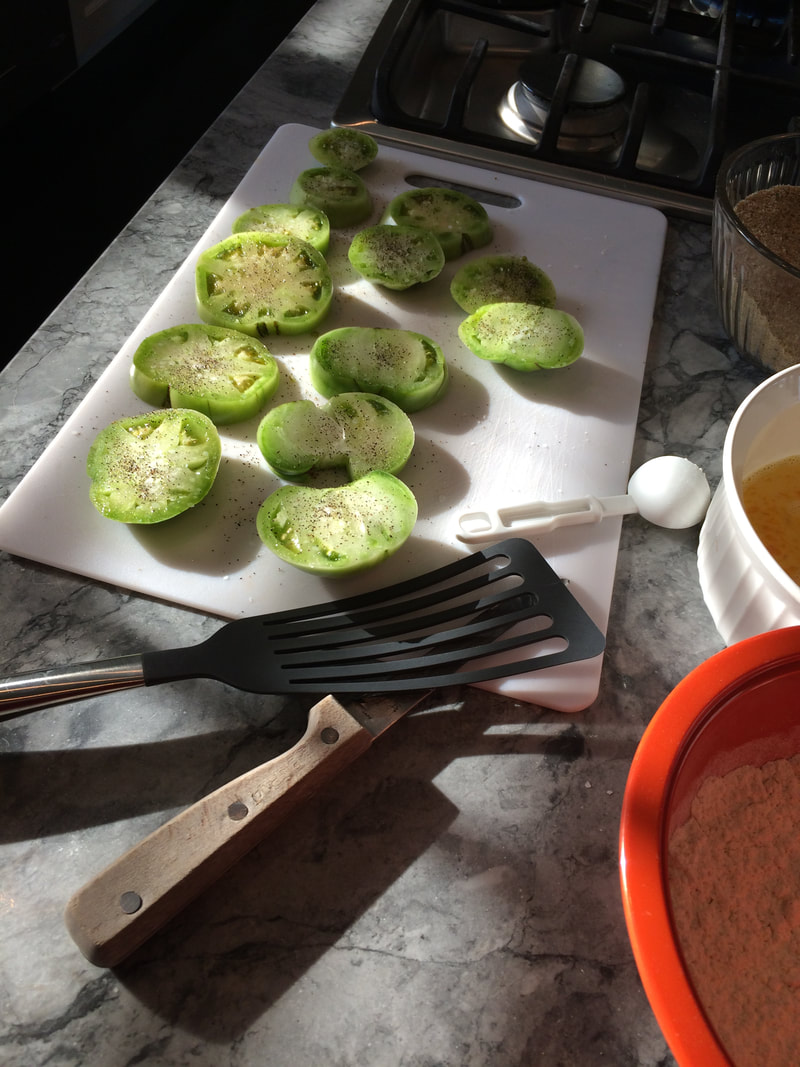
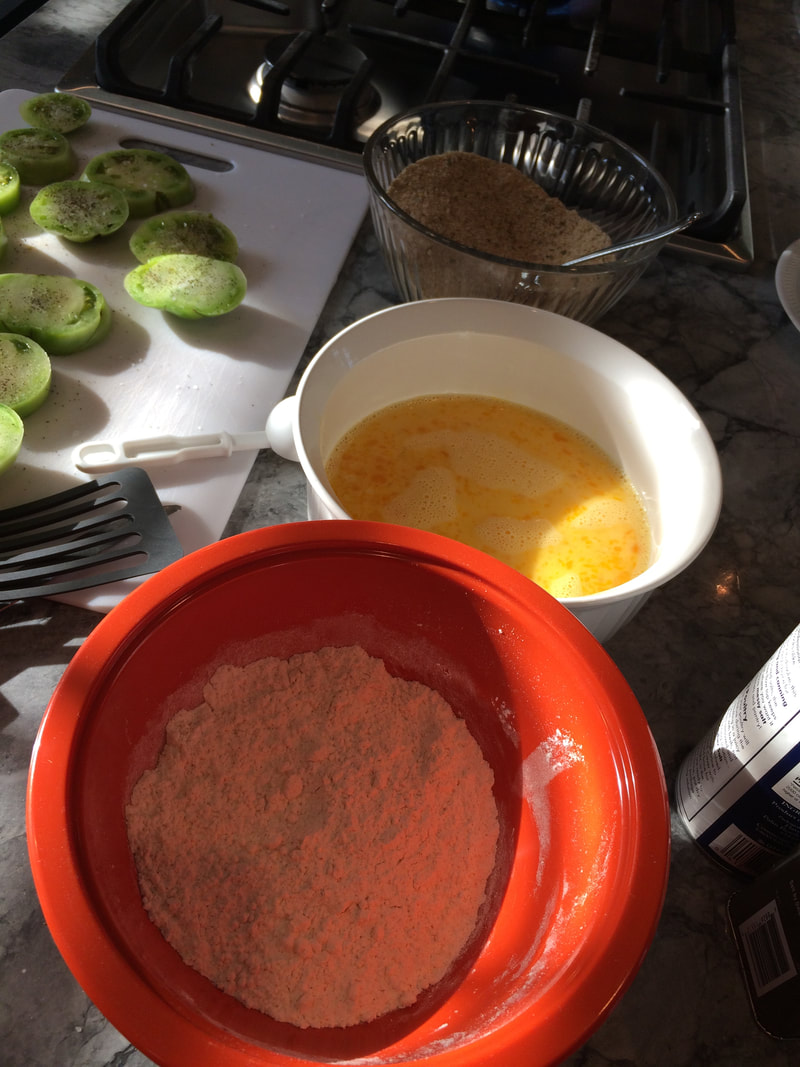
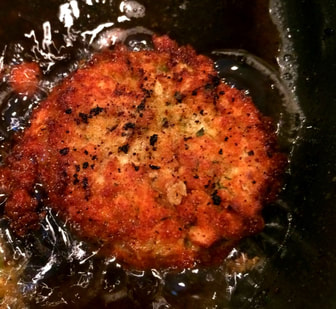
When the movie Fried Green Tomatoes came out 1992 I was fascinated by its name and the thought of how that dish would actually taste, and why green tomatoes in the first place. For the young northern European ears and mind, it just sounded like something very exotic.
Well, all these years have passed, and even though I went to college in the States, and lived there for several years, I never ate fried green tomatoes - before this summer! Oh, and I loved them, the taste, the texture, all of it! 

Like most breaded, fried things, it can be a bit messy to make, but it was fun to do it with friends, and the results are worth any possible mess you will have to clean up. 
And of course, it is green tomatoes, since they are solid enough to hold the form as they are worked on and fired. 
I have no claim to this recipe, it was one that we used and it was handed to me. I did alter a number of eggs and the amount of breadcrumbs since we had way too much left over when we were done. 
Picture
Picture
Picture
Picture
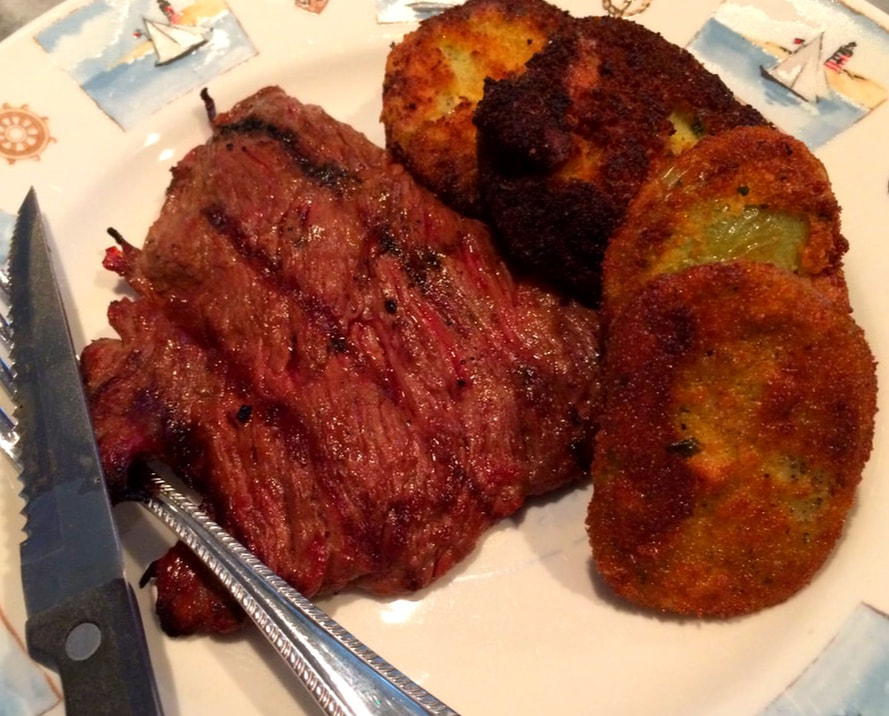
We served them on the side of a well-marinated beef, and it was a lovely meal, indeed. The fact that the tomatoes came from the home garden made the meal even more special and tasty, in my opinion. 
I hope you are enjoying the last days of summer with some home-grown produce.
Till next time
~ Cheers!
Picture
Picture

FRIED GREEN TOMATOES

  • Oil
  • 4 green tomatoes, cut into 1/4-inch rings
  • Kosher salt and freshly ground black pepper
  • 3/4 cup all-purpose flour
  • 1 tablespoon garlic powder
  • 2 eggs
  • 2 tablespoons milk
  • 1 cups panko bread crumbs
  • Pinch cayenne pepper
  • Pinch paprika
  1. Preheat oil to 350F / 180C.
  2. Season tomatoes, on both sides, with salt and pepper. Place flour and garlic powder in a shallow dish. 
  3. In another shallow dish, beat eggs with the milk. 
  4. In another dish, mix bread crumbs with cayenne and paprika. 
  5. Dredge tomatoes through the flour, then the eggs, and then through the bread crumbs. 
  6. Add only a few pieces to the fryer at a time, so they can cook evenly about 2 to 3 minutes. 
  7. Drain on paper towels 
0 Comments

Books & Spoons recipe for THE GAZPACHO SOUP

18/8/2017

0 Comments

 
Picture
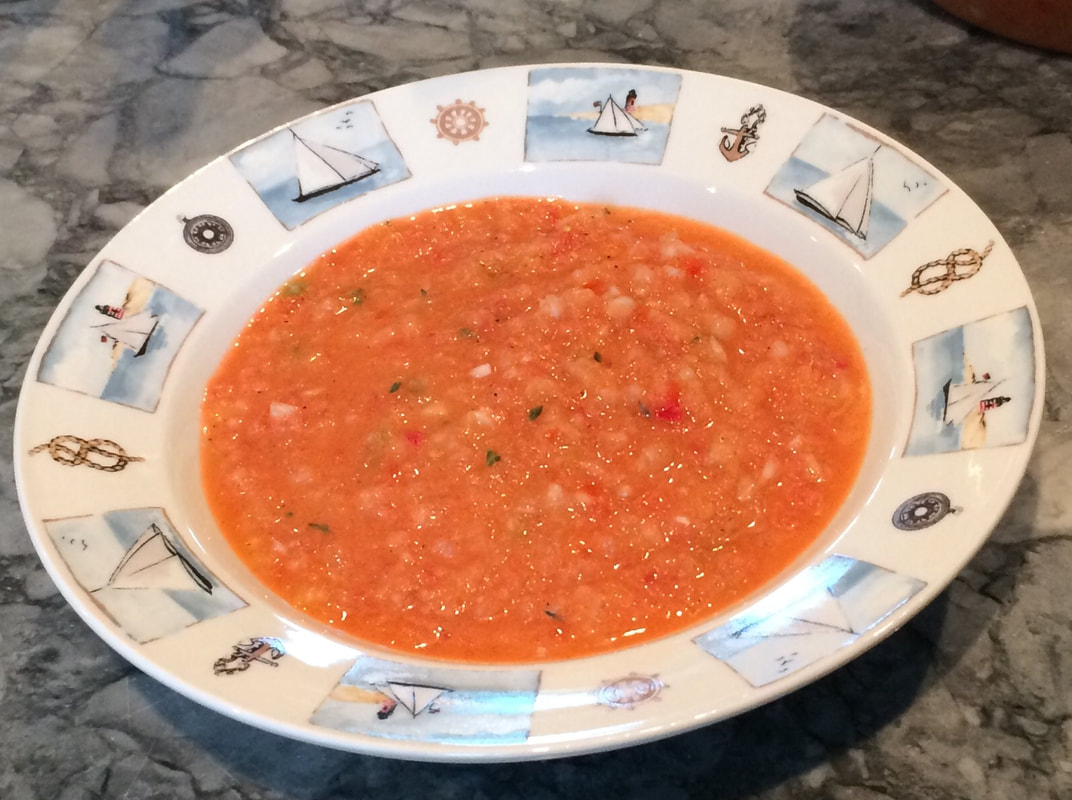
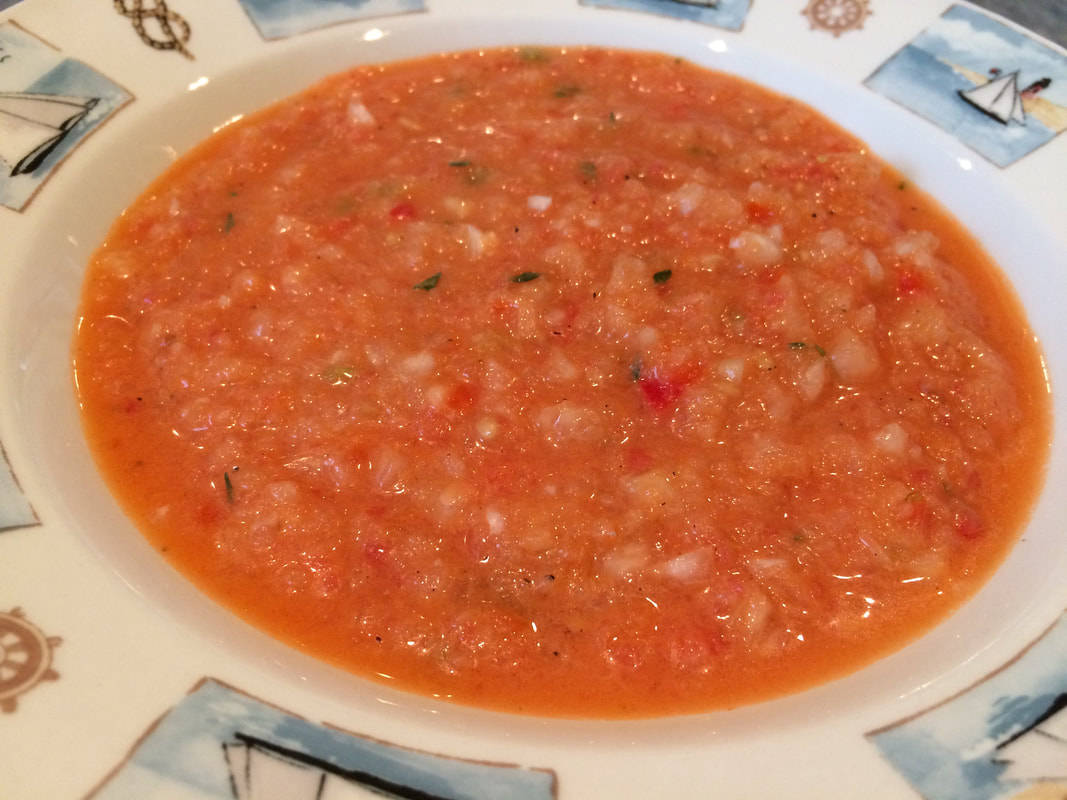
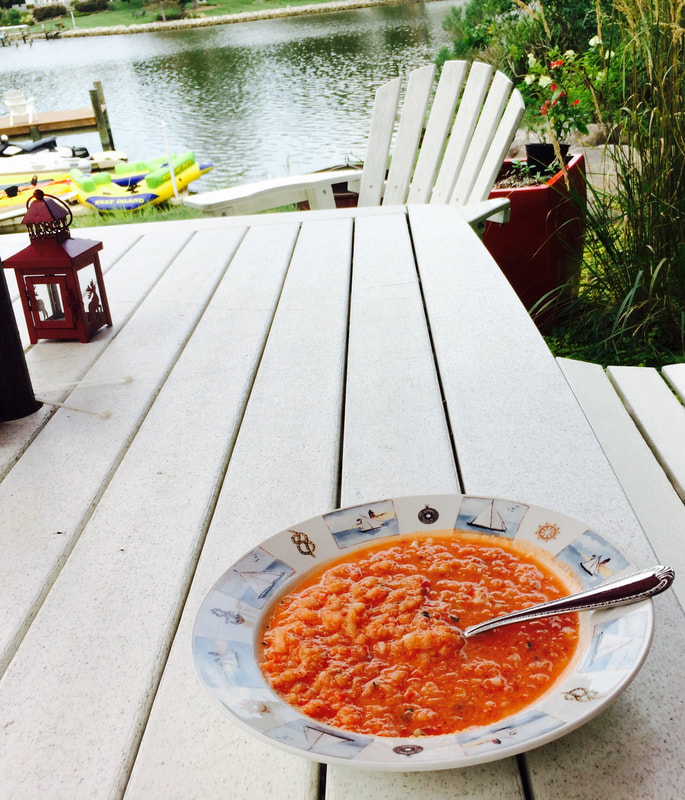
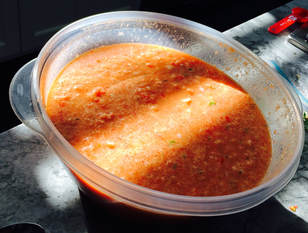
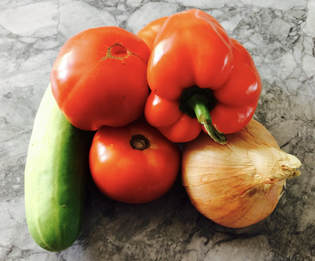
​I swear, food never tastes as good as when the ingredients are straight from a garden and you prepare the meal with your friends then leisurely enjoy it on a hot summer evening while watching a sunset over the water... 
Last summer I enjoyed the harvest from my own little cherry tomato plant on my deep kitchen windowsill that was gifting me with eight harvests with the sweetest, sun riped tomatoes I have ever had. This summer I got the opportunity to visit friends who have a vegetable garden and the products were plentiful and so, so tasty! 
And as the temperature was going up to the point of being uncomfortable at times, to prepare ice cold Gazpacho using mostly just ingredients from the garden, that was a treat! 

Picture
Picture
Picture
There are as many recipes and variations to the Gazpacho, non-cooked, cold tomato and vegetable soup, as there are people preparing it. Being considerate to the people enjoying it, we prepared the soup without the bread still being able to get a smooth consistency and thick, tasty soup.  We added some jalopeno into the soup, giving it a little more bite and nice after kick. But it was balance by adding a half cucumber more than the recipe reguires, as well. 
It takes awhile for the soup to chill, and as it changes temperature, it is important to keep tasting it (not a bad task, I promise you) to make sure the flavors are still on point. 
I hope you are enjoying the season and taking advantage of the harvest upon us right now. This is my favorite time of the year when all the veggies, berries, and fruits are at their best quality and so readily available in the forests, gardens, and market places. 
Until next time
~ Cheers!
Picture

The Gazpacho Soup Recipe
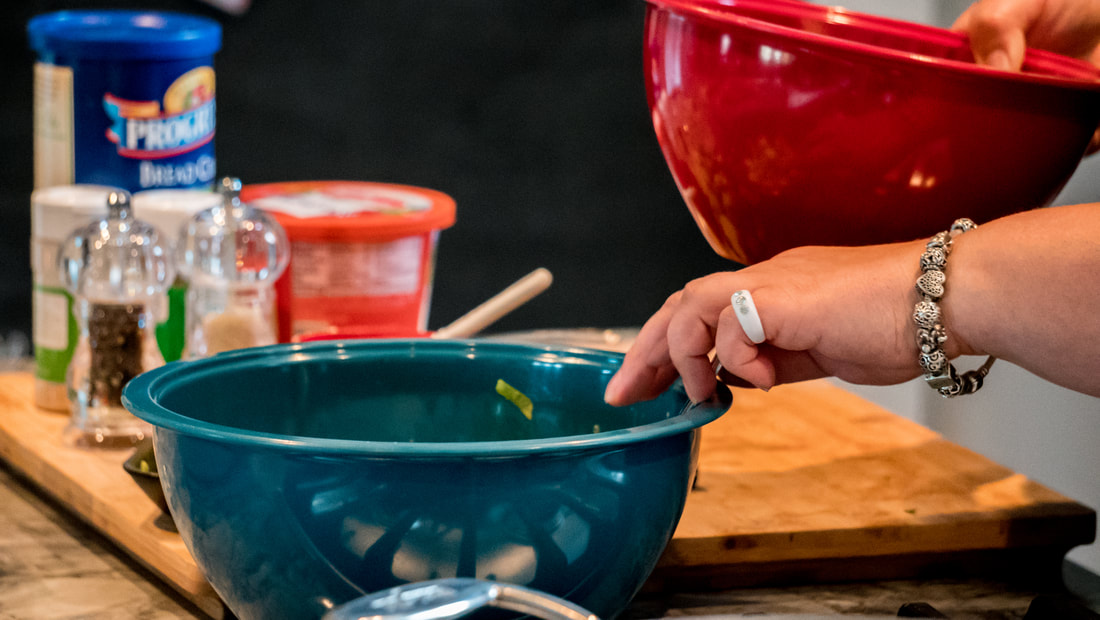
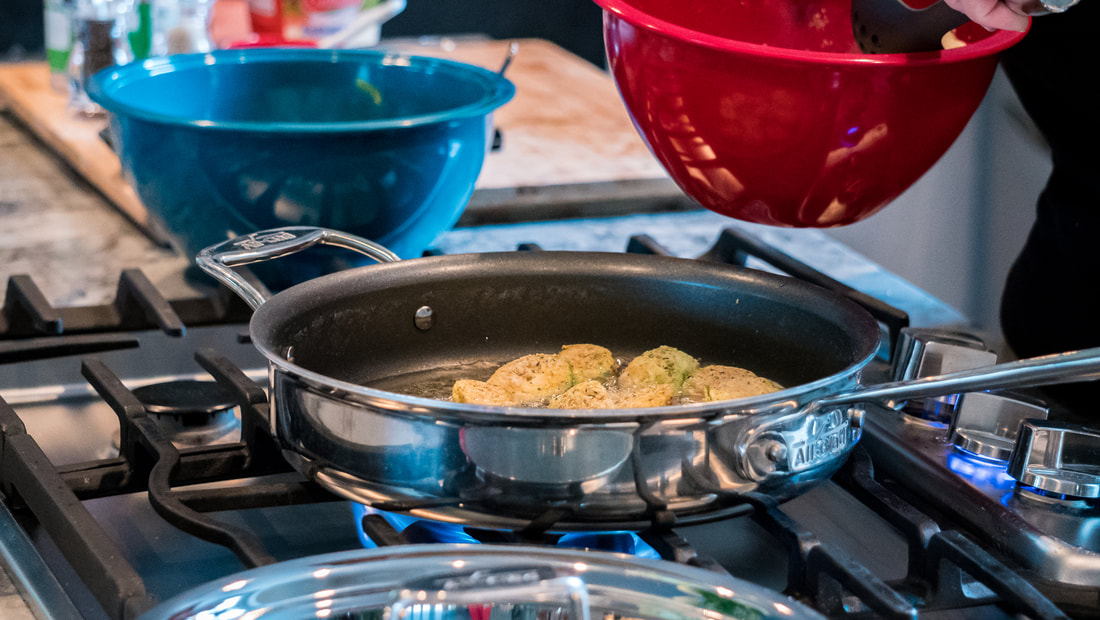
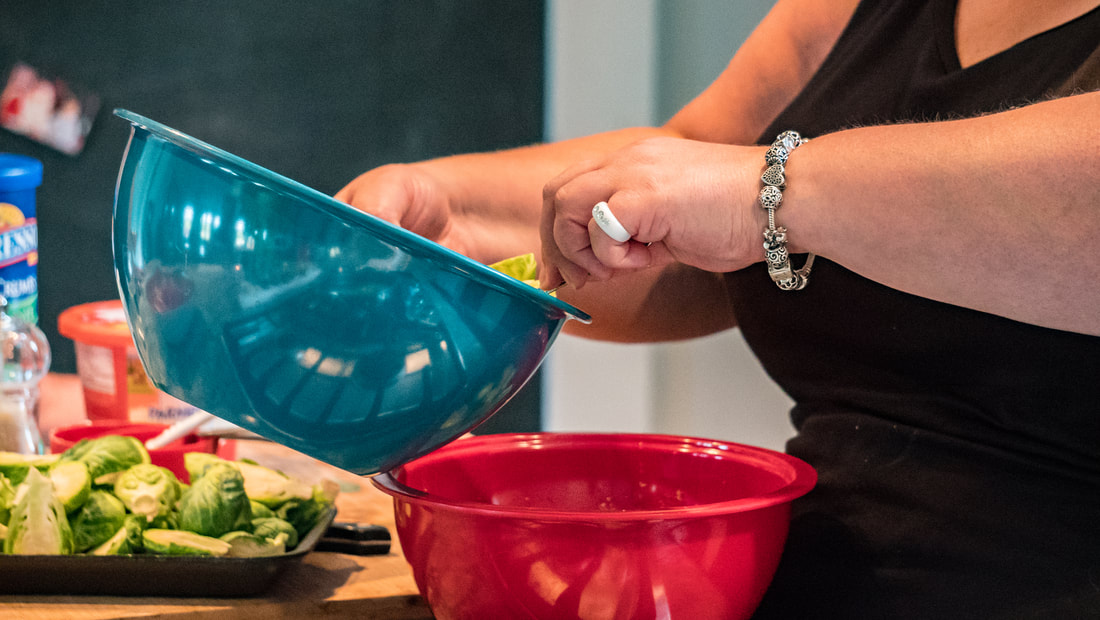
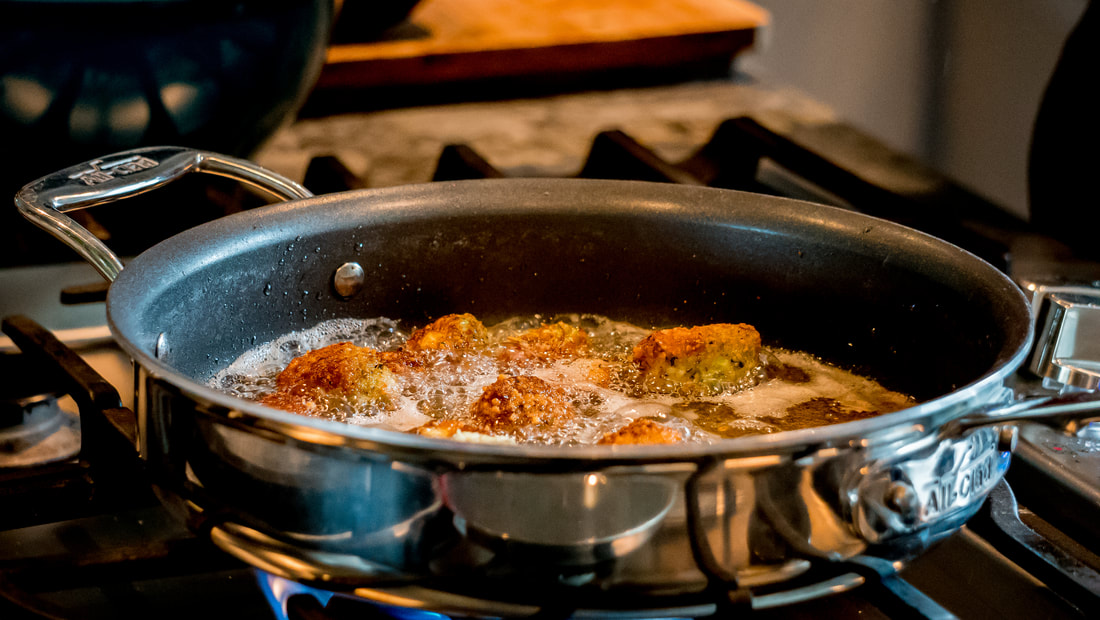
  • 1,5 cucumber, peeled, deseeded and chopped
  • 1 red pepper, deseeded and chopped
  • 1 green pepper, deseeded and chopped
  • 1 kg / 2 lb ripe plum tomatoes, peeled, cored and chopped
  • 1-2 jalopeno peppers, deseeded and chopped (to taste)
  • 2 garlic cloves, peeled and crushed
  • 1 yellow onion finely chopped
  • 2–2½ tbsp sherry vinegar, or to taste
Picture
  1. Place the cucumber, peppers, tomatoes, garlic and spring onions in a large bowl. 
  2. Season well with salt and pepper. 
  3. Add the sherry vinegar and a couple of tablespoons of olive oil and mix together with your hands, pressing down to squeeze out the juices. (You can let this marivate for an hour if you so choose)
  4. Put the vegetable mixture into a blender and whiz until smooth. 
  5. Check the consistency. If it is still rather thick and not very rich, add another glug or two of olive oil until you reach a consistency you like. 
  6. Taste and adjust the seasoning as necessary. You might need a little more vinegar. 
  7. Cover and chill again, until really cold and you’re ready to serve.
  8. To serve, stir the gazpacho and taste again as the seasoning may have changed as the soup is now very cold. Adjust as necessary. 
0 Comments

The Perfect Summer Evening with GRILLED SALMON and other treats

11/8/2017

0 Comments

 
Picturephoto credit @focusbykenneth
​I'm back! What a wonderful and inspirational vacation I had, I can't wait to share with you some of the new recipes I tried while vacationing and visiting friends! Such tasty food with great flavors, cooking with friends, and having a lovely time - what could beat that?! Nothing, in my book... 

Sometimes the ambiance is what makes the meal to stand out by intensifing the flavors, and puts you in the mood to relax and enjoy the treats about to be served for you. 

This meal, as you can see, was served at the perfect spot, on a beautiful summer evening, with dear friends around the table. What fun it was to prep for the cooking and then set to go with everyone around and having a great time. 
Usually, when I cook I am alone in the kitchen, in charge of the whole process from food prep to pictures and clean up, yet this time I had @focusbykenneth with his talent and camera for some of the pictures, and I am super thankful for him letting me share his pictures with you! Go check out his Instagram account for pictures around the world with inspiration to see #beautyintheworld 
Picture
photo credit @focusbykenneth
Picture
photo credit @focusbykenneth
Picture
photo credit @focusbykenneth
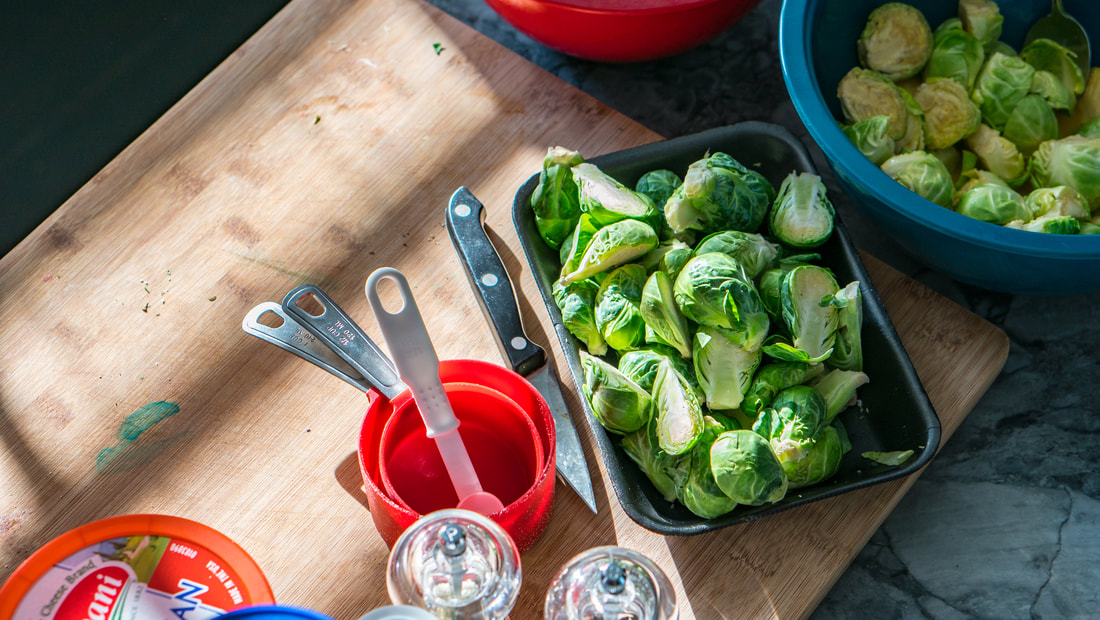
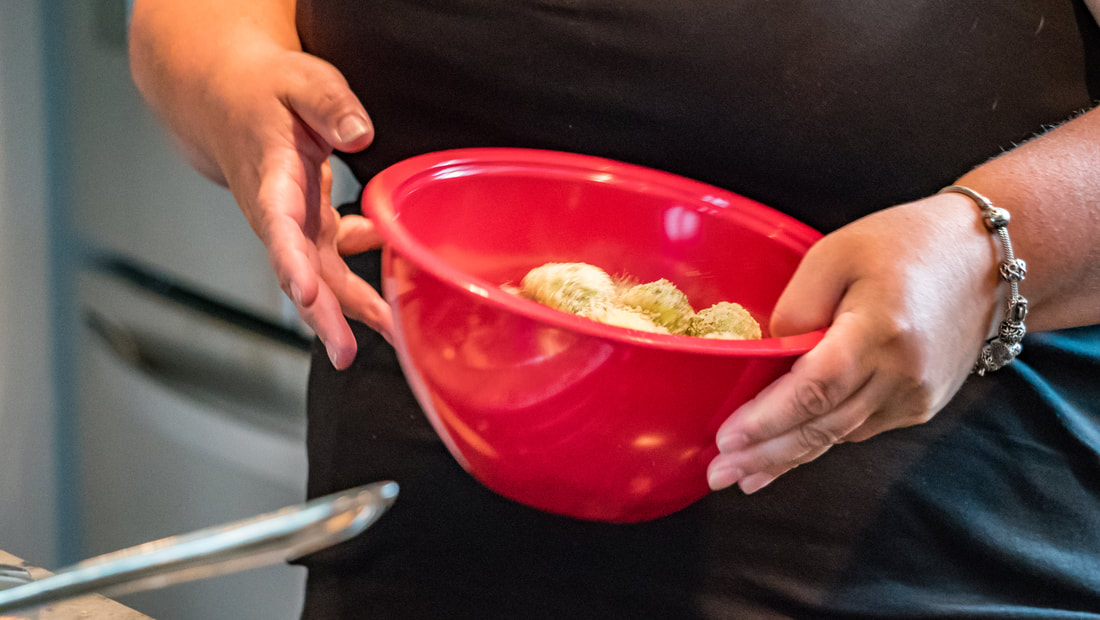
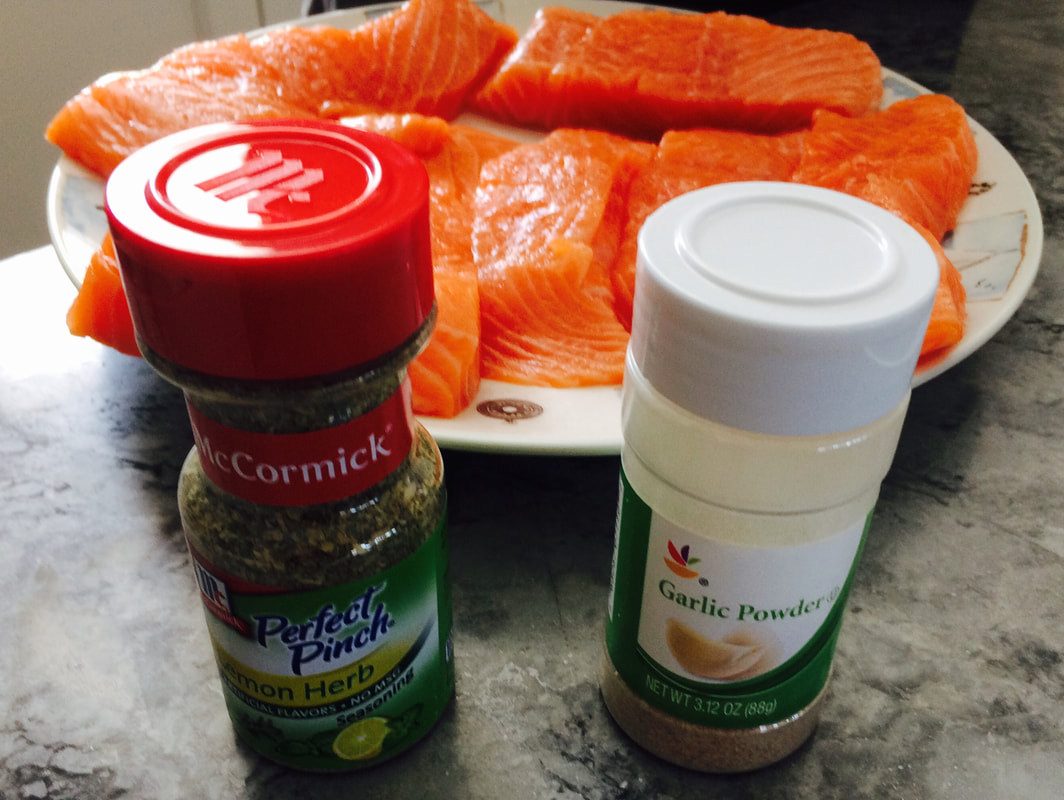
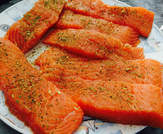
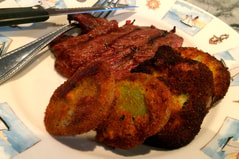
​For the meal itself, I made the Parmesan crusted deep fried Brussel sprouts that I have shared with you before. Just click here to get the recipe. 
With the Brussel sprouts, my friend grilled this amazing marinated salmon that was the perfect companion to the Brussel sprouts. I am so glad I can share this recipe with you today. 
Picture
photo credit @focusbykenneth
Picture
photo credit @focusbykenneth
Picture
photo credit @focusbykenneth
Picture

​For the desserts, we had a selection of Whole Food's petit fours.
So fun to taste bites of all the different sweet flavors and succulent textures!

It is so good to start the fourth year of Books & Spoons, and Spoons in particular, with such a fun, joy filled, warm memories of this unforgettable evening! Much more to come, so stay tuned through the seasons to come.
Till next time
~ Cheers!
GRILLED SALMON FILLETS
  • 1 1/2 LB salmon fillets
  • Lemon pepper to taste
  • Garlic powder to taste
  • Salt to taste
  • 1/3 cup soy sauce
  • 1/3 cup brown sugar
  • 1/3 cup water
  • 1/4 cup vegetable oil

  1. Season the salmon with lemon pepper, garlic powder, and salt
  2. In a small bowl stir together soy sauce, brown sugar, water, and vegetable oil until sugar is dissolved
  3. Place fish in a large resealable plastic bag with the marinade mixture, seal, and turn to coat.
  4. Refrigerate for at least 2 hours.
  5. Preheat the grill for medium heat
  6. Lightly oil grill grate
  7. Place salmon on the preheated grill, and discard marinade.
  8. Cook salmon for 6 to 8 minutes per side, or until fish flakes easily with a fork
Picture
Picture
Picture
Picture
A secret ingredient that can be used to replace the soy sauce!
0 Comments
    Picture

    SOCIAL MEDIA

    Picture
    FACEBOOK
    Picture
    PINTEREST
    Picture
    ​TWITTER
    Picture
    BLOGLOVIN
    Picture
    INSTAGRAM
Powered by Create your own unique website with customizable templates.